Using Python OpenCV with NumPy for Image Processing
python opencv with numpy: Learn how OpenCV images are NumPy arrays, how to access and modify pixels, and how to use vectorized operations for efficient image processin...
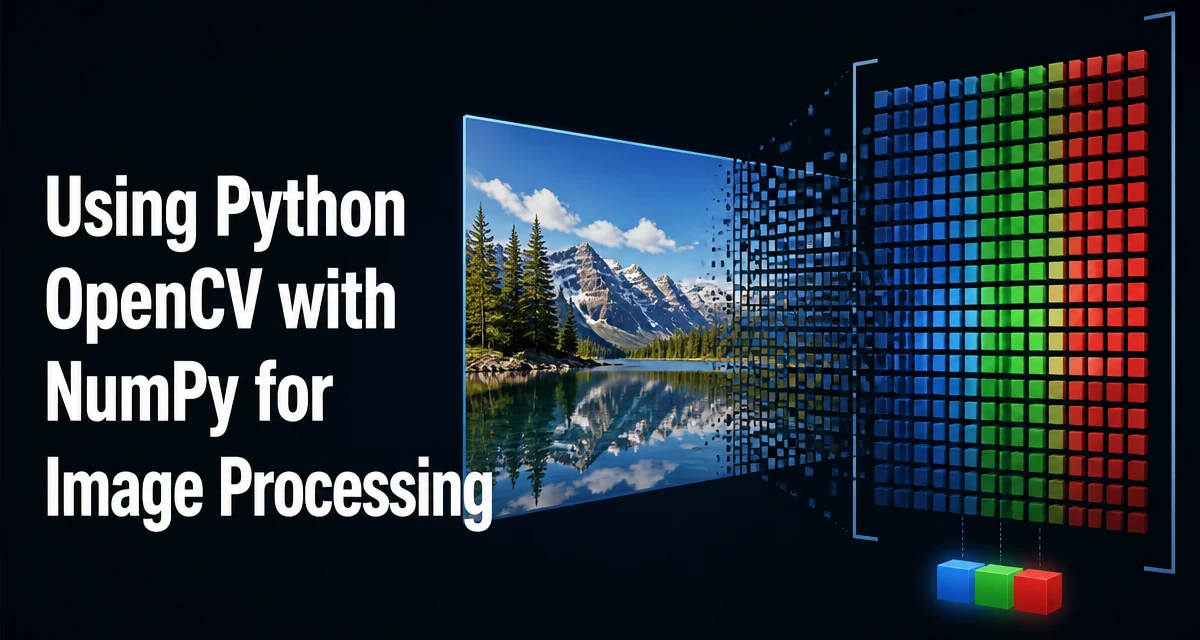
When you read an image with OpenCV in Python, the result is not a custom image object but a NumPy array. This design is central to how OpenCV works in Python: nearly every function you call expects or returns a NumPy array, and the array's shape, dtype, and memory layout determine how the image behaves. Understanding this relationship is the key to writing correct and efficient image-processing code with python opencv with numpy.
What OpenCV Images Are in NumPy Terms
OpenCV's cv2.imread returns a numpy.ndarray. For a typical color image, the array has shape (height, width, 3) and dtype uint8. The three channels are ordered as Blue, Green, Red (BGR), not RGB. A grayscale image is a 2D array of shape (height, width) with the same uint8 dtype.
The fact that the image is a NumPy array means you can use all NumPy operations directly on it. For example, you can slice the array to crop a region, use boolean indexing to create masks, or apply arithmetic operations to adjust brightness. This integration is not accidental; it allows OpenCV to rely on NumPy's efficient array operations and makes it easy to combine OpenCV with other scientific Python libraries.
import cv2
import numpy as np

image = cv2.imread('photo.jpg')
print(type(image))      # <class 'numpy.ndarray'>
print(image.shape)      # (480, 640, 3) for a 640x480 color image
print(image.dtype)      # uint8
Reading and Writing Images with cv2.imread and cv2.imwrite
cv2.imread reads an image from a file and returns a NumPy array. The second argument controls the color mode: cv2.IMREAD_COLOR (default) returns a BGR image, cv2.IMREAD_GRAYSCALE returns a single-channel array, and cv2.IMREAD_UNCHANGED preserves the original alpha channel if present.
When writing, cv2.imwrite expects a NumPy array and an output filename. The function infers the format from the file extension. It returns True if the write succeeded and False otherwise.
import cv2

# Read a color image
img = cv2.imread('input.jpg', cv2.IMREAD_COLOR)

# Write it back as PNG
success = cv2.imwrite('output.png', img)
print(success)  # True if the file was written
One common mistake is to assume that cv2.imread returns None when the file is missing. It actually returns None, and any attempt to access .shape on None raises an AttributeError. Always check the result before using the array.
Accessing and Modifying Pixel Values
Because the image is a NumPy array, you can access individual pixels using indexing. For a color image, image[y, x] returns a 1D array of three values [blue, green, red]. For a grayscale image, it returns a single scalar.
import cv2

img = cv2.imread('photo.jpg')
# Get the BGR values at pixel (x=100, y=50)
pixel = img[50, 100]
print(pixel)  # e.g., [ 34  87 201]

# Modify that pixel to pure red (BGR: 0, 0, 255)
img[50, 100] = [0, 0, 255]
Modifying a single pixel is rarely useful. More often, you'll want to change a region or apply a filter. NumPy slicing makes this straightforward. For example, to set the top-left 100x100 region to black:
img[0:100, 0:100] = [0, 0, 0]
This works because the slice is a view into the original array, not a copy. Changes to the slice affect the original image immediately. If you need a copy, use .copy().
Converting Between Color Spaces
OpenCV provides cv2.cvtColor to convert between color spaces. The function takes a NumPy array and a conversion code. Common conversions are cv2.COLOR_BGR2RGB, cv2.COLOR_BGR2GRAY, and cv2.COLOR_BGR2HSV.
The output is a new NumPy array with the same dtype and spatial dimensions but with a different number of channels. For example, converting to grayscale reduces the shape from (h, w, 3) to (h, w). Converting to HSV keeps three channels but changes the meaning of the values.
import cv2

img = cv2.imread('photo.jpg')
gray = cv2.cvtColor(img, cv2.COLOR_BGR2GRAY)
hsv = cv2.cvtColor(img, cv2.COLOR_BGR2HSV)

print(gray.shape)  # (h, w)
print(hsv.shape)   # (h, w, 3)
Color conversion is a C++-optimized operation in OpenCV, so it is much faster than iterating over pixels in Python. When you need to work in a different color space, always use cv2.cvtColor rather than writing your own conversion loop.
Using NumPy Operations for Image Processing
Because the image is a NumPy array, you can apply any NumPy operation directly. This is especially useful for tasks like thresholding, masking, and arithmetic adjustments.
For example, to increase brightness by adding a constant to every pixel, you can simply add a scalar to the array. NumPy will broadcast the scalar across all elements.
import cv2
import numpy as np

img = cv2.imread('photo.jpg')
brighter = img + 50  # Add 50 to every pixel, wrapping around at 255
Be careful: adding a scalar to a uint8 array will wrap around on overflow (e.g., 250 + 50 becomes 44). If you want saturation instead of wrapping, use cv2.add or np.clip.
# Saturated addition
brighter = cv2.add(img, 50)

# Or clip after addition
brighter = np.clip(img.astype(np.int16) + 50, 0, 255).astype(np.uint8)
Boolean indexing is another powerful tool. To create a binary mask based on a pixel value, you can compare the array directly:
mask = img[:, :, 2] > 128 # Red channel > 128
You can then use the mask to select or modify pixels. For example, to set all pixels where the red channel is high to white:
img[mask] = [255, 255, 255]
This vectorized approach is far more efficient than looping over each pixel in Python.
Performance Considerations: Avoid Python Loops
Python loops over individual pixels are extremely slow because each iteration involves Python-level overhead. NumPy and OpenCV are designed to work with vectorized operations that execute in C. Whenever you find yourself writing a nested for loop to process an image, there is almost always a NumPy or OpenCV function that does the same thing faster.
For example, to apply a threshold to a grayscale image, use cv2.threshold instead of a loop:
_, binary = cv2.threshold(gray, 127, 255, cv2.THRESH_BINARY)
Similarly, for arithmetic operations, use cv2.add, cv2.subtract, cv2.multiply, or cv2.divide rather than element-wise Python loops. These functions handle overflow and dtype conversion correctly.
When you need to combine multiple NumPy operations, try to do as much work as possible in vectorized form. For example, to compute the mean of the blue channel, use img[:, :, 0].mean() instead of iterating.
Handling Data Types and Memory Layout
OpenCV images are typically uint8, but many operations produce intermediate results that need a larger range. For example, subtracting two images can yield negative values, which uint8 cannot represent. In such cases, convert the array to a signed dtype like np.int16 or np.float32 before performing the operation, then clip and convert back if necessary.
img1 = cv2.imread('a.jpg')
img2 = cv2.imread('b.jpg')

diff = img1.astype(np.int16) - img2.astype(np.int16)
# diff can be negative; clip to 0..255 and convert back
diff_clipped = np.clip(diff, 0, 255).astype(np.uint8)
Memory layout matters when passing arrays to OpenCV functions. OpenCV expects contiguous arrays in most cases. NumPy arrays created by slicing are often non-contiguous. If you pass a non-contiguous array to an OpenCV function, it may raise an error or make an internal copy. Use np.ascontiguousarray to ensure contiguity when needed.
import numpy as np

# Non-contiguous view
roi = img[::2, ::2]  # Downsample by taking every other pixel
roi = np.ascontiguousarray(roi)  # Make it contiguous
Common Pitfalls and How to Avoid Them
One frequent mistake is forgetting that OpenCV uses BGR ordering. When you display an image with Matplotlib, which expects RGB, the colors appear inverted. Convert with cv2.cvtColor(img, cv2.COLOR_BGR2RGB) before plotting.
Another pitfall is assuming that cv2.imread returns an array with a specific shape. The shape depends on the image content and the flags you pass. Always check image.shape and image.dtype before writing code that assumes a particular layout.
Also, be aware that modifying a slice of an image modifies the original array because slices are views. If you want to work on a copy, use .copy(). This is especially important when you crop a region and then apply operations that you intend to keep separate.
Finally, when combining NumPy operations with OpenCV functions, pay attention to the dtype. OpenCV functions often require uint8 or float32 arrays. Passing a float64 array may cause an error or unexpected behavior. Convert explicitly when necessary.